Murgen: the first iteration of the ultrasound dev-kit in a nutshell
Preparing the electronics
BOM : time to get some shopping done !
We've managed to squeeze the budget down to the 500€ enveloppe.
- Get a murgen dev-kit: 140€ in electronics + PCB. Or 100€ with the components to put on a breadboard =)
- Get a BitScope: 150€
- Get a transducer : 110€ for brand new adaptaed ones, ~100€ for one found on ebay and hacking it
- Get a Trinket Pro / Arduino : 10€
- Get some small electronics (breadboard, cables et al) : 20€
- Misc (Pizza, Beer, and a donation to Murgen): 15€
First steps
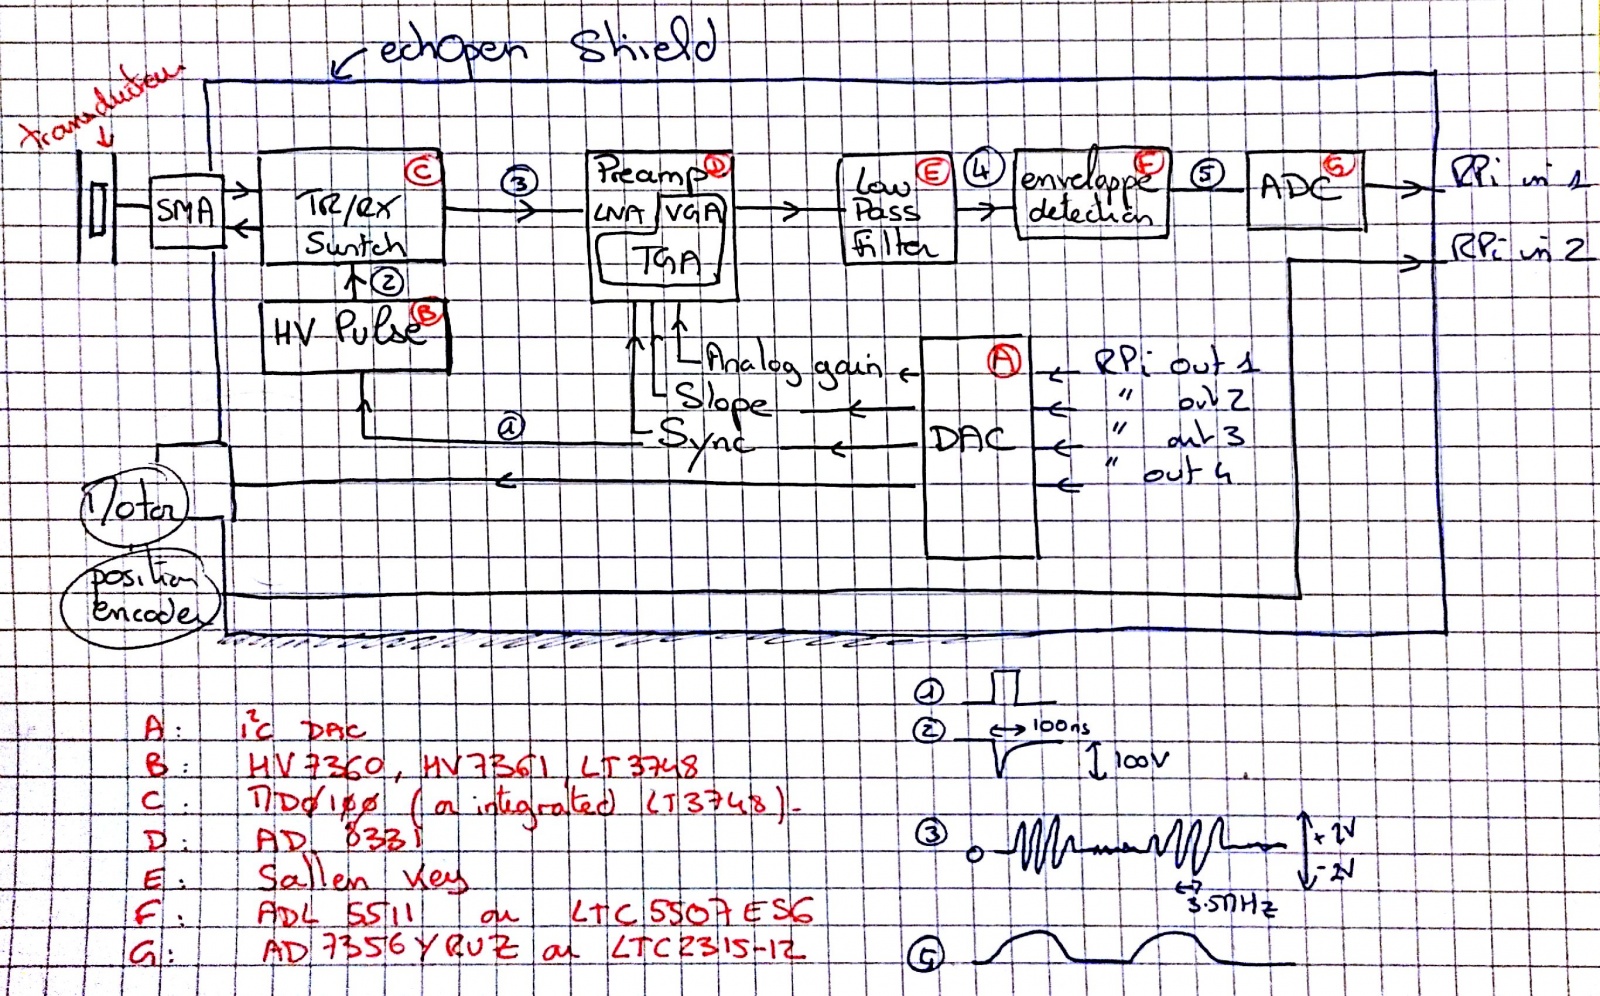
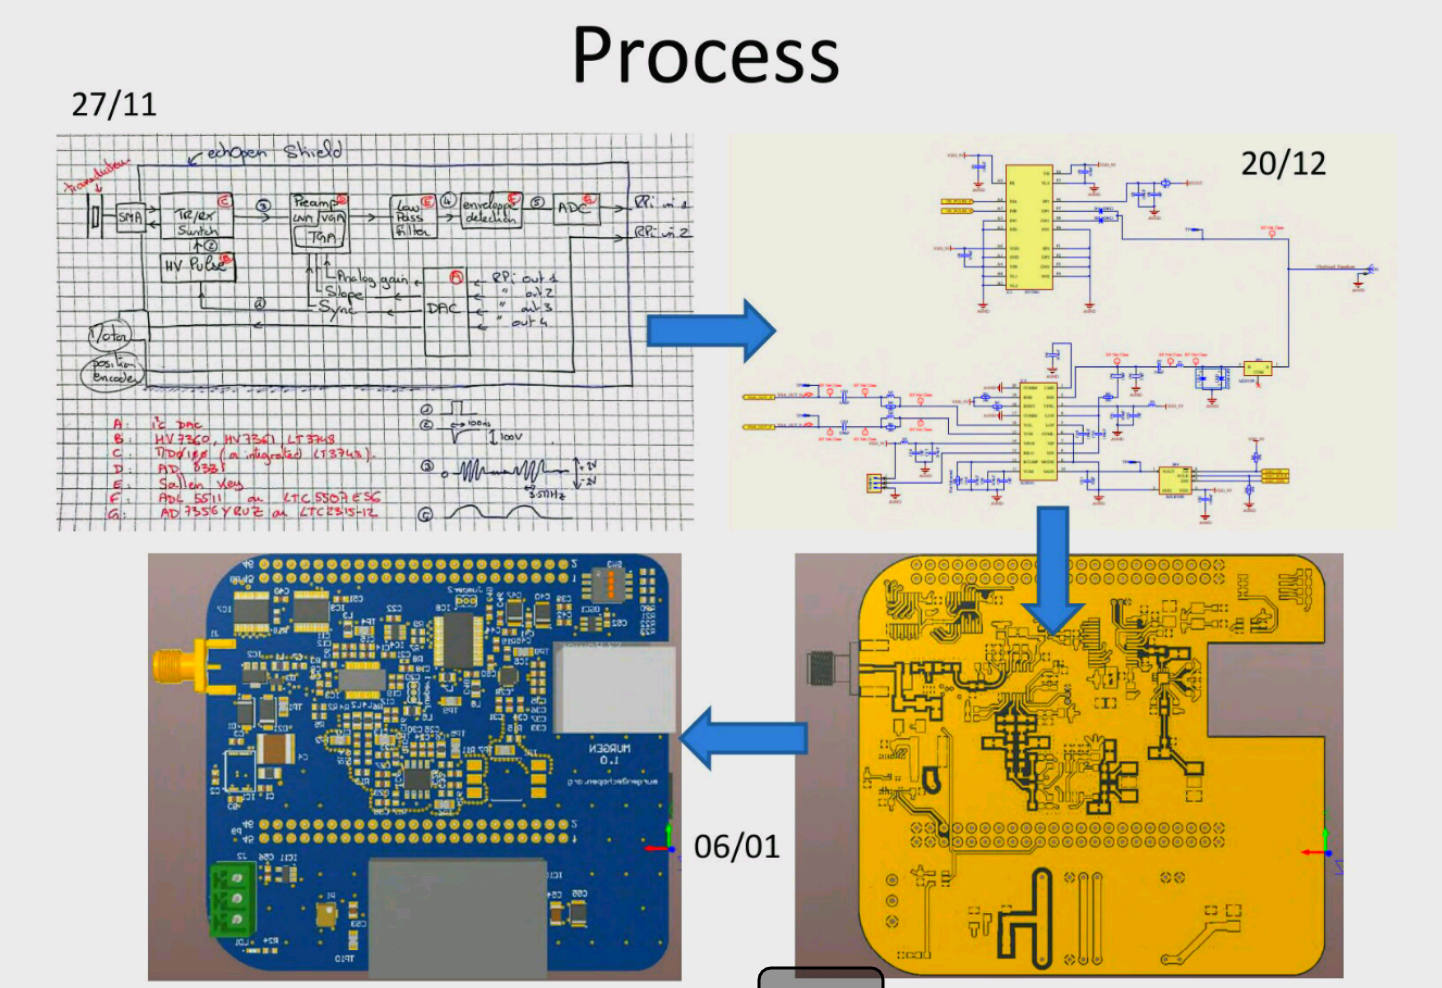
After a couple of exchanges, I knew what was needed on the board, and drafted the first block diagrams by end of 11/2015:
Moving forward
With an electrical engineering friend, I got the first layout, then gerbers by end of december 2015
Out of the fab
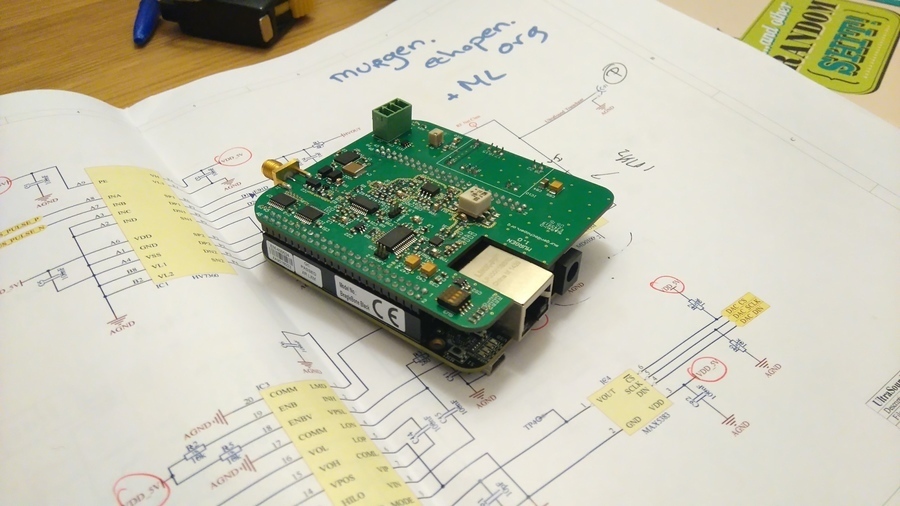
And by end of Feb 2016, bam the first board!
Results
Of course, more can be read on the process on the worklog section, below.
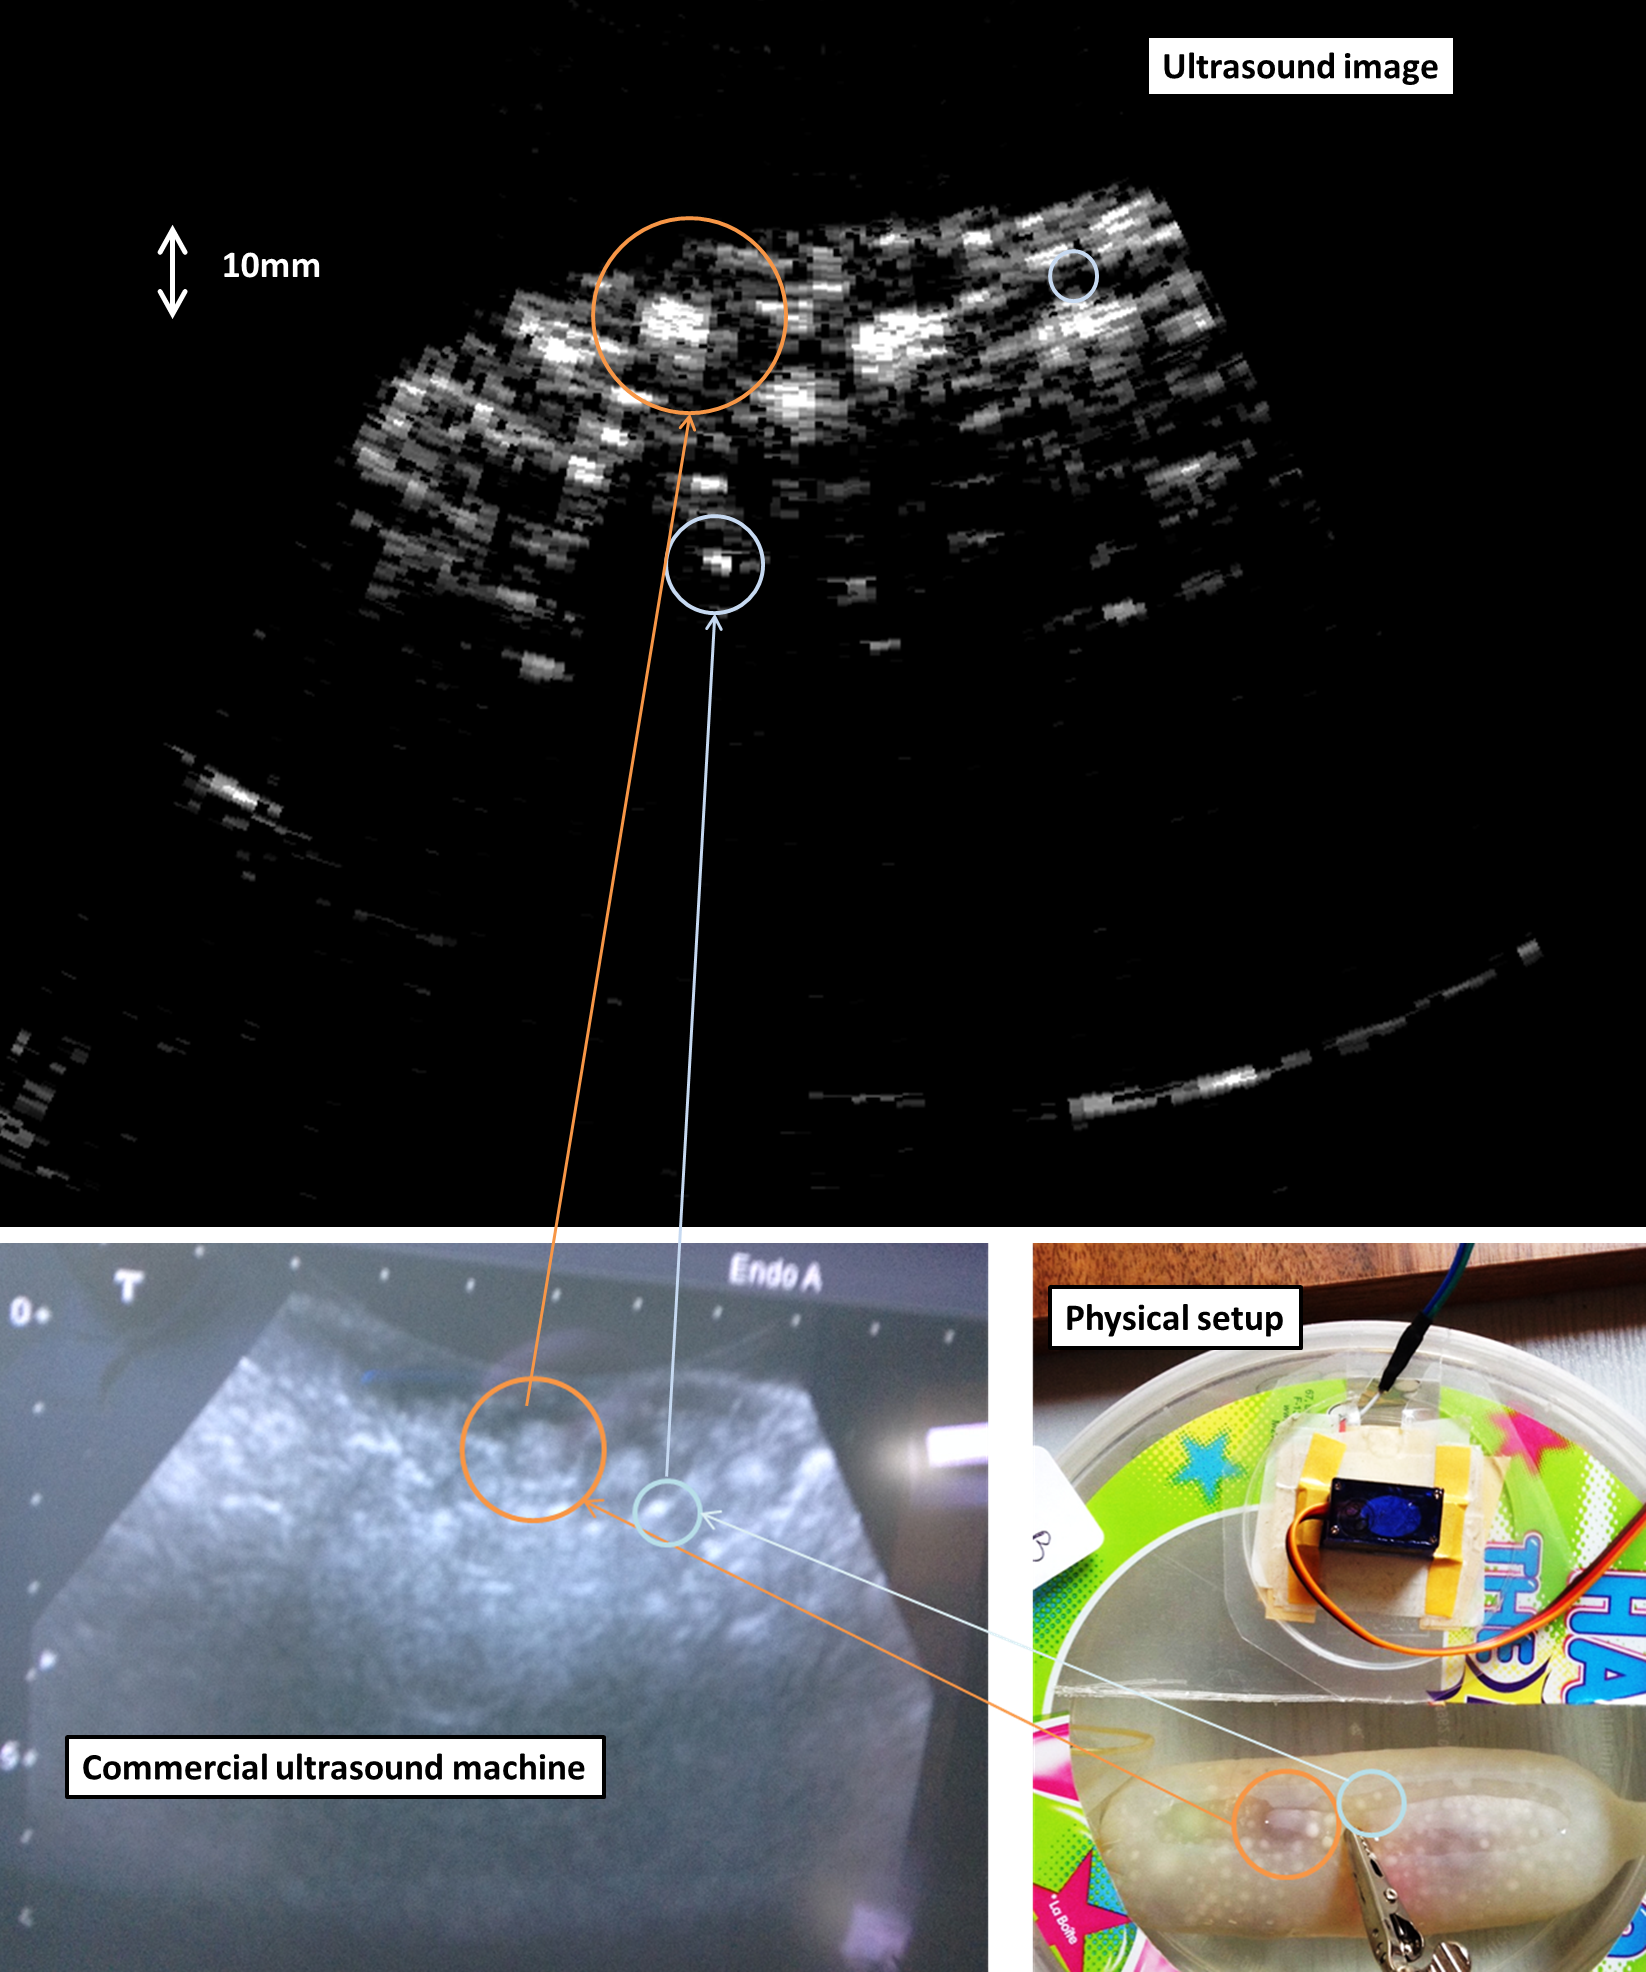
The key achievements were that we got our first ultrasound image with the murgen board =) Not a baby, mind you, but at least an echo coming from a part of a fantom (condom filled with agar gel and tapioca balls) in front of the transducer. And we haven't tapped into the full capabilities of the board yet, so it can be improved! Enclosed, the picture of the same fantom, using a commercial, 100k$ ultrasound machine.
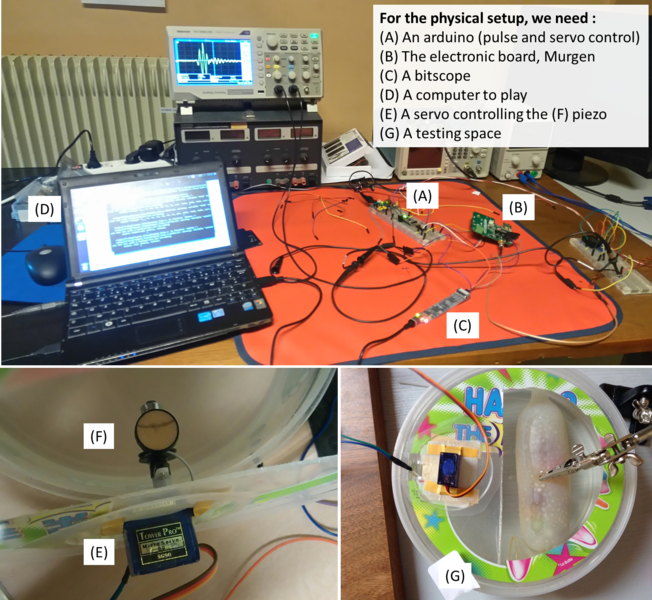
with a simple setup: