Adding videos
There are two loops saved so far.
Hacking an old ultrasound probe with a module dev-kit
Brief
The aim of this experiment is double, namely to:
- check the behavior of the analog modules, and
- to check the behavior of an old ATL probe.
The modules have already been tested, but not the PRUDAQ. The advantage of the PRUDAQ versus the other DAQ is that the data is exposed as /dev/beaglebone within the beaglebone black, and that it can store 320M worth of data in a single shot.
Results
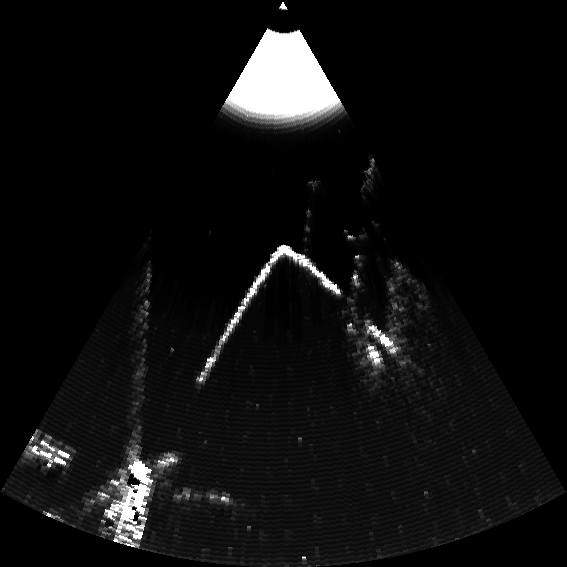
Imaging a small 1cm side cubic dice: acquisition during 1s.

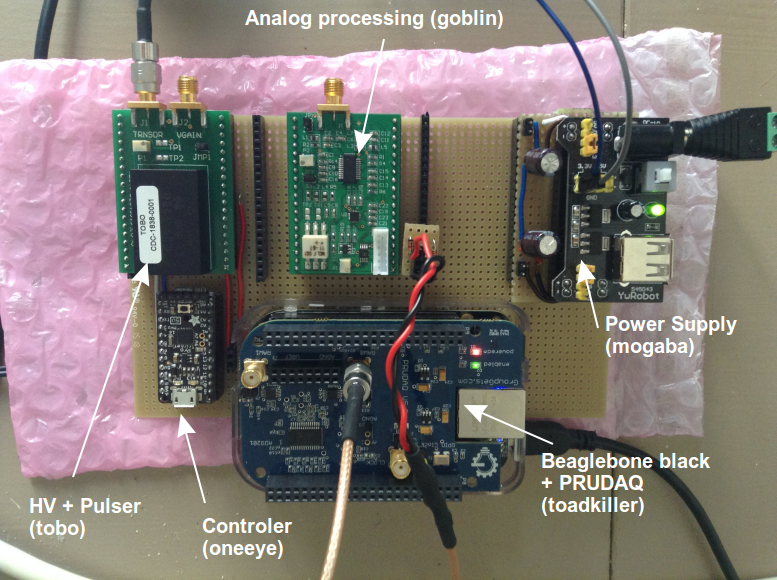
Materials requirements / BOM
Some stuff, unexpensive to buy, to build a ultrasound testing kit -- 500$
- A power supply giving 3.3V and 5V (mogaba) -- 5$
- An analog processing (goblin) -- 130$
- A high voltage pulser (tobo) -- 110$
- A motherboard (doj) made out of stripboard -- 10$
- A pulser (oneeye) from a trinket pro -- 20$
- An old ATL probe (retroATL3) -- 75$
- A beaglebone and PRUDAQ (toadkiller) -- 150$
Need one of the custom boards? Message me at kelu124@gmail.com !
Setup of the modules
Connecting the modules
Connecting the probe
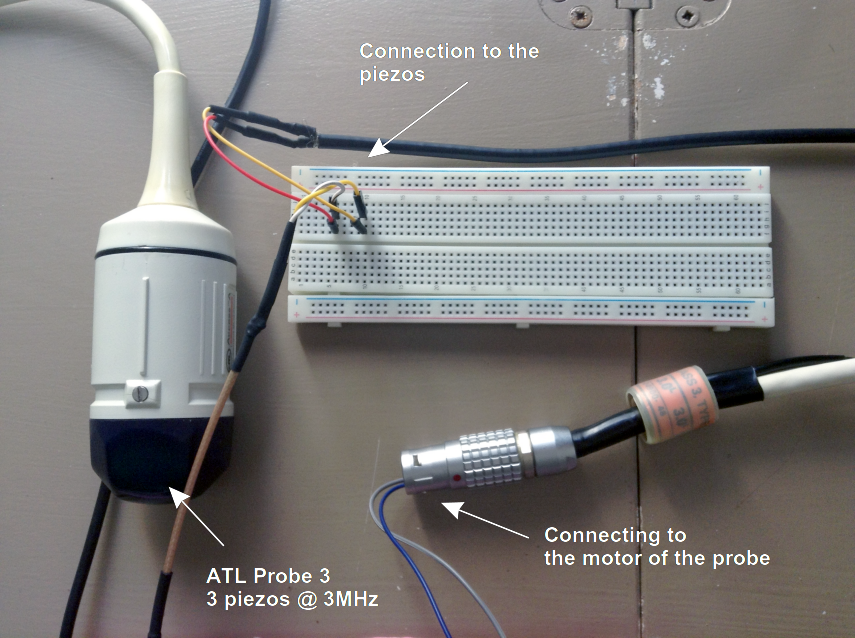
Hacking process
Analog processing
The analog processing is managed by a HV+pulser module as well as an amplifier + enveloppe detector module. Tests were done in the respective module folders.
Testing the ATL probe
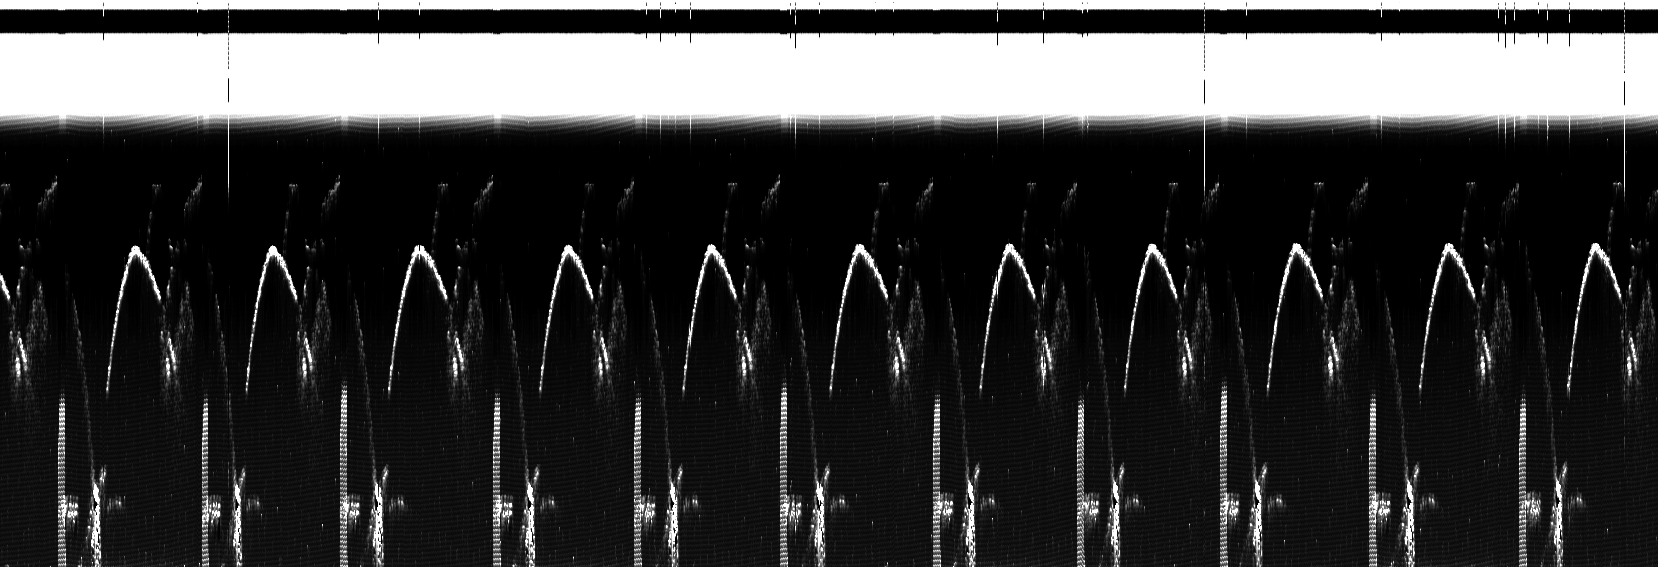
The PRUDAQ was setup to capture 32M of files at 10MHz (Jumper 1 on the external position). The signal (the enveloppe) was clipped at 1.4V since the PRUDAQ only accepts a [0-2V] input.
One can export the data, exposed from /dev/beaglelogic with:
debian@beaglebone:~$ sudo dd if=/dev/beaglelogic of=sonde3V_1.bin bs=1M count=32
32+0 records in
32+0 records out
33554432 bytes (34 MB) copied, 0.939505 s, 35.7 MB/s
Analyzing the binary dump provides the following image. We can see 10 full images, shot in 1s -- hence a rotation speed of the probe at 3.3V of around 10 rotation per seconds.
Scan conversion
Once the images segmented, we can isolate the images and scan-convert those. For the sake of experiment, I've been using a single simple nearest-neihghbour conversion:
Functional blocks and modules

Next steps
- Debug the position control
- Add a feedback control to the motor
20160822 Acquiring a fantom image
The following acquisition was done with an old mechanical ultrasound probe, along with the pulser module, the analog processing module. The acquisition was done with a beaglebone PRUDAQ at 10Msps. I'm not mentionning the power supply module.
You can download the raw data at using this link.
The raw image

The animated image
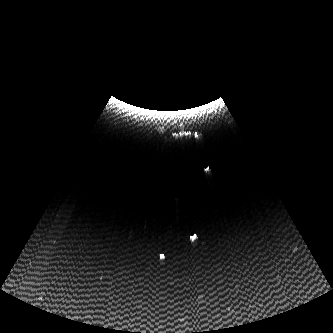
Comparing with the fantom
I guess the points we see are the points on the left hand of the fantom. The top of the fantom is not seen as the near field artifact is at goes till around 2cm (according to the probe specs).
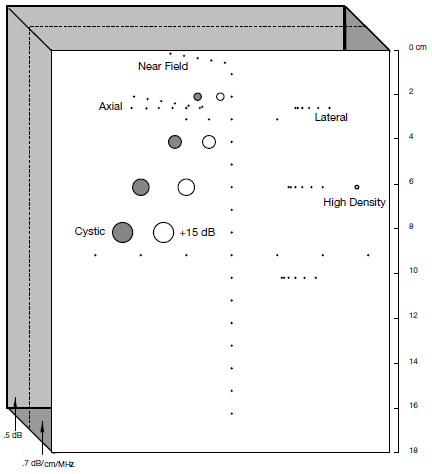
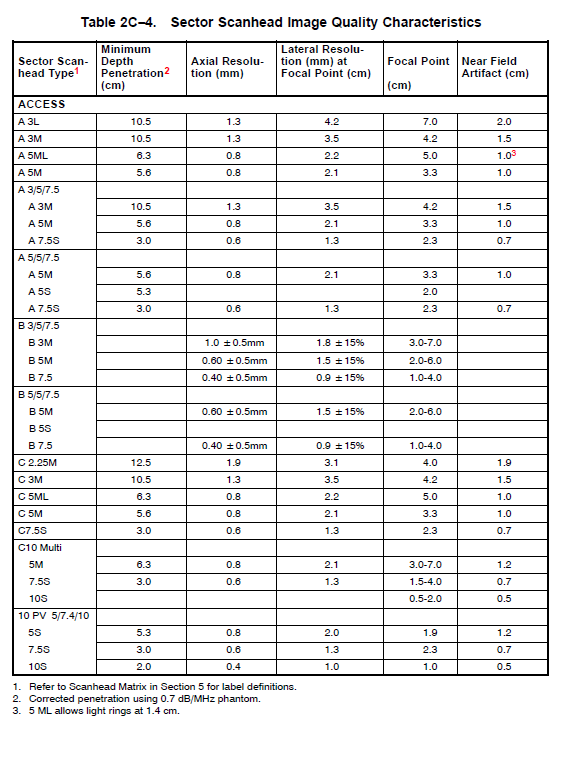
Some comments
As seen in the list of probes, the probe we've been using has the following characteristics:
- near field artifact till 2cm
- focal point at 7cm
- Lateral resolution of 4.2mm at 7cm depth
- Axial resolution of 1.3mm at focal depth
This matches with what we're seeing.
Annex
Probe details
Setup